本文说明如何使用vscode的native-debug连接pyocd调试zephyr.
本文说明运行的环境是在ubuntu NB下通过daplink连接nrf52 board, 通过vscode+pyocd进行调试。
起因
以前一直在vscode中用cortex-debug插件连接pyocd调试zephyr(DAPLink+VSCode调试nrf52_moderate),能识别svd,能自己启动pyocd gdbserver非常好用。但最近升级pyocd到0.18.0后, 通过cortex-debug无法正常启动pyocd的gdbserver,手动启动gdbserver后想要通过cortex-debug连接过去也不行。为了方便调试zephyr,研究了native-debug通过gdb连接pyocd的方法,相比于cortex-debug除了如下不足外其它的调试都一样:
- 无法自动启动pyocd gdbserver
- 无法加载svd文件,显示svd描述的寄存器
方法
如果从来没有配置过可以参考DAPLink+VSCode调试nrf52_moderate进行配置。然后进行下面修改
1.安装native debug插件
Vscode插件里面搜索Native debug安装即可.
2.修改launch.json
下面的launch.json增加了basetest和mcuboot两个debug选项,这两个选项都是使用native-debug的gdb进行调试1
2
3
4
5
6
7
8
9
10
11
12
13
14
15
16
17
18
19
20
21
22
23
24
25
26
27
28
29
30
31
32
33
34
35
36
37
38
39
40
41
42
43
44
45{
// 使用 IntelliSense 了解相关属性。
// 悬停以查看现有属性的描述。
// 欲了解更多信息,请访问: https://go.microsoft.com/fwlink/?linkid=830387
"version": "0.2.0",
"configurations": [
{
"type": "gdb",
"request": "launch",
"name": "basetest",
"target": "/home/frank/work/project/nrf52_moderate/apps/basetest/build/zephyr/zephyr.elf",
"cwd": "${workspaceRoot}",
"autorun": [
"target remote 127.0.0.1:3333",
"load /home/frank/work/project/nrf52_moderate/apps/basetest/build/zephyr/zephyr.elf"
],
"gdbpath": "/opt/gcc-arm-none-eabi-7-2017-q4-major/bin/arm-none-eabi-gdb"
},
{
"type": "gdb",
"request": "launch",
"name": "mcuboot",
"target": "/home/frank/work/project/zephyrproject/mcuboot/boot/zephyr/build/zephyr/zephyr.elf",
"cwd": "${workspaceRoot}",
"autorun": [
"target remote 127.0.0.1:3333",
"load /home/frank/work/project/zephyrproject/mcuboot/boot/zephyr/build/zephyr/zephyr.elf"
],
"gdbpath": "/opt/gcc-arm-none-eabi-7-2017-q4-major/bin/arm-none-eabi-gdb",
},
{
"cwd": "${workspaceRoot}",
"executable": "/home/frank/work/project/nrf52_moderate/apps/basetest/build/zephyr/zephyr.elf",
"name": "Debug Microcontroller",
"request": "launch",
"type": "cortex-debug",
"servertype": "pyocd",
"targetId":"nrf52",
"armToolchainPath": "/opt/gcc-arm-none-eabi-7-2017-q4-major/bin/",
"svdFile": "/home/frank/work/project/zephyrproject/zephyr/ext/hal/nordic/nrfx/mdk/nrf52.svd",
"showDevDebugOutput": true
}
]
}
选项说明:
- type : 使用gdb连接
- request: launch是加载程序并运行调试
- target: 调试的目标elf
- gdbpath: 调试用gdb
- autorun: gdb启动后自动运行的命令,这里是远程连接pyocd的gdbserver和加载烧写elf
3.运行pyocd gdbserver
使用下面命令pyocd会连接daplink并启动gdbserver:1
pyocd gdbserver --persist -t nrf52 -bh
这里-t nrf52说明我用的是nrf52系列的芯片,如果使用其它芯片可自行修改,-bh是用硬件断点替换软件断点, -r是reset cpu后halt住.
运行成功后会看见下面打印1
2
3
4
5
6
7
8
9
10
11
12
13
14
15
16
170000219:INFO:board:Target type is nrf52
0000333:INFO:dap:DP IDR = 0x2ba01477
0000347:INFO:dap:AP#0 IDR = 0x24770011
0000353:INFO:dap:AP#1 IDR = 0x02880000
0000363:INFO:rom_table:AP#0 ROM table #0 @ 0xe00ff000 (designer=244 part=006)
0000370:INFO:rom_table:[0]<e000e000:SCS-M4 class=14 designer=43b part=00c>
0000376:INFO:rom_table:[1]<e0001000:DWT class=14 designer=43b part=002>
0000381:INFO:rom_table:[2]<e0002000:FPB class=14 designer=43b part=003>
0000386:INFO:rom_table:[3]<e0000000:ITM class=14 designer=43b part=001>
0000392:INFO:rom_table:[4]<e0040000:TPIU-M4 class=9 designer=43b part=9a1 devtype=11 archid=0000 devid=0:0:ca1>
0000397:INFO:rom_table:[5]<e0041000:ETM-M4 class=9 designer=43b part=925 devtype=13 archid=0000 devid=0:0:0>
0000401:INFO:cortex_m:CPU core is Cortex-M4 r0p1
0000411:INFO:cortex_m:FPU present: FPv4-SP
0000416:INFO:dwt:4 hardware watchpoints
0000418:INFO:fpb:6 hardware breakpoints, 4 literal comparators
0000436:INFO:server:Semihost server started on port 4444
0000436:INFO:gdbserver:GDB server started on port 3333
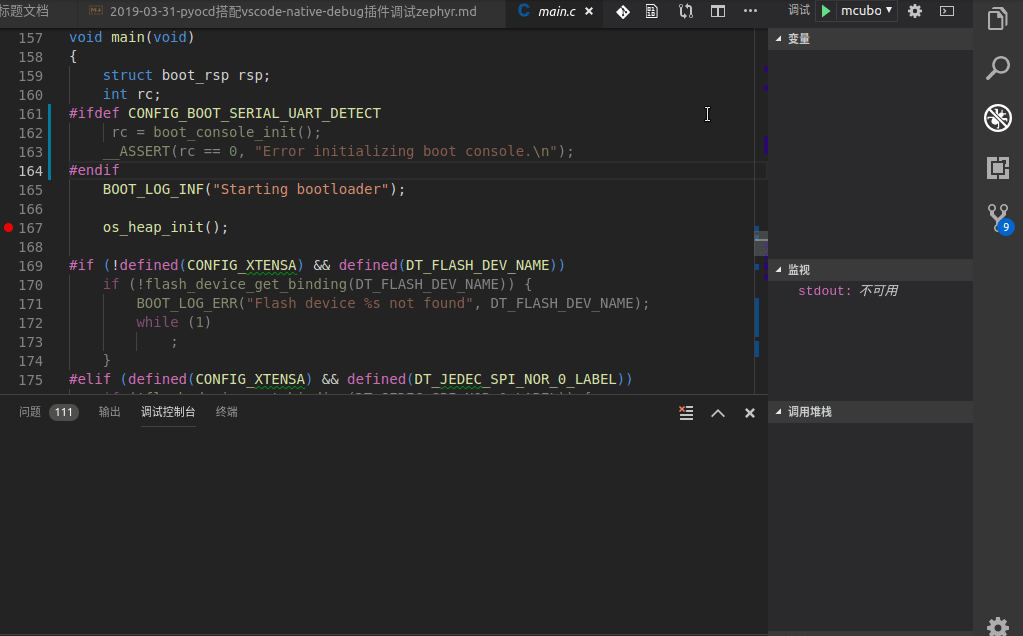
4.Vscode中debug
点击调试的绿色三角运行符号会自动开始下载进入调试,下图就是调试zephyr-mcuboot的示例: